IIS server configuration for EspoCRM
As of v7.0.
These instructions are supplementary to the server configuration guidelines. All configuration settings listed here are made on Windows Server 2019.
Note
URL Rewrite must be installed on the IIS server.
To сonfigure IIS server for EspoCRM, do the following steps.
Step 1. Physical Path adjusting
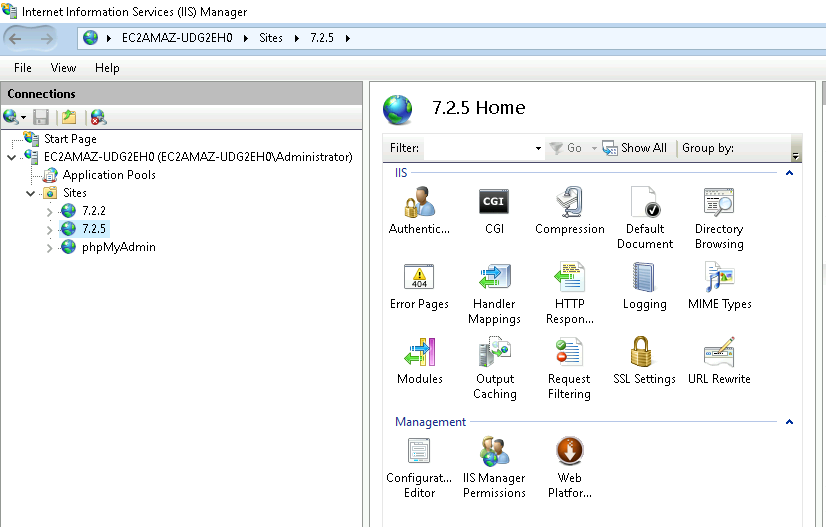
1.1. Go to IIS Manager, select your Site.
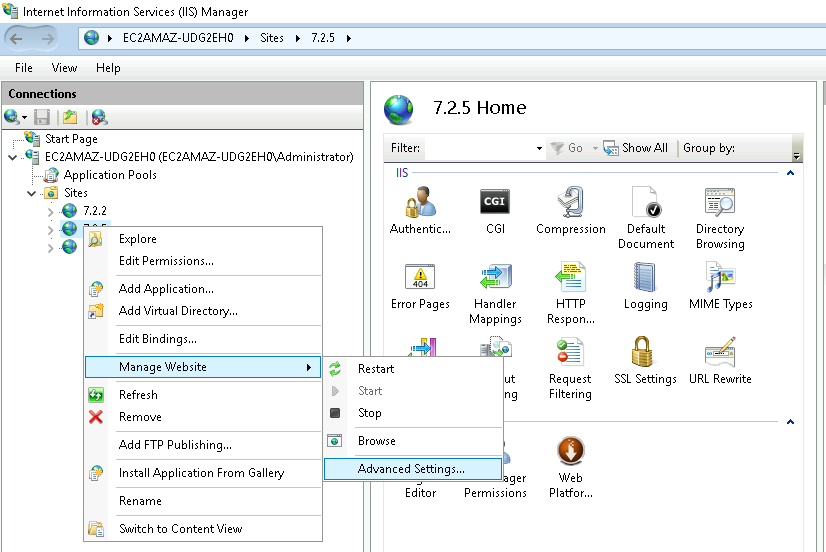
1.2. Right-click on Site > Manage Website > Advanced Settings.
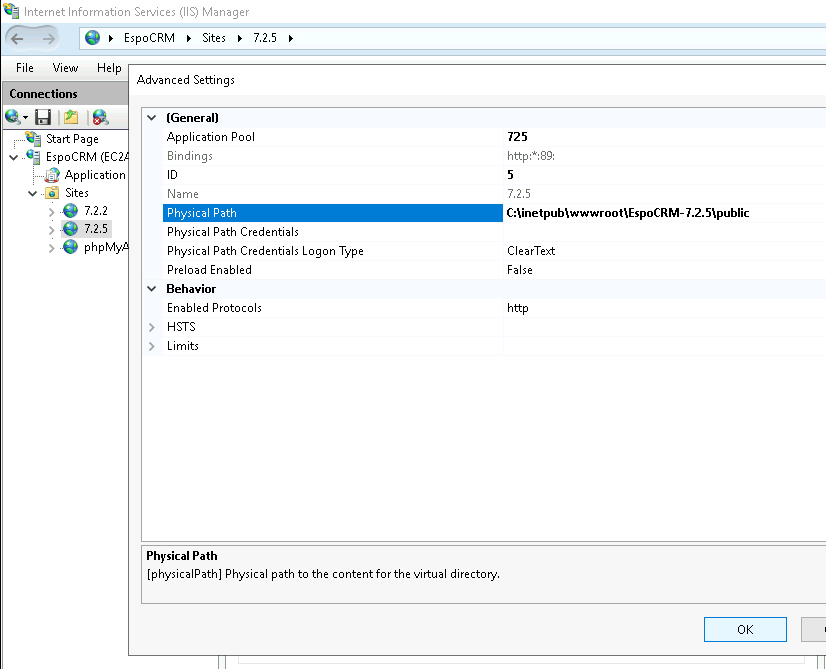
1.3. Specify your EspoCRM public directory path (e.g. C:\inetpub\wwwroot\EspoCRM-7.2.7\public) in the Physical Path field.
1.4. Click on OK.
Step 2. Virtual Path adjusting
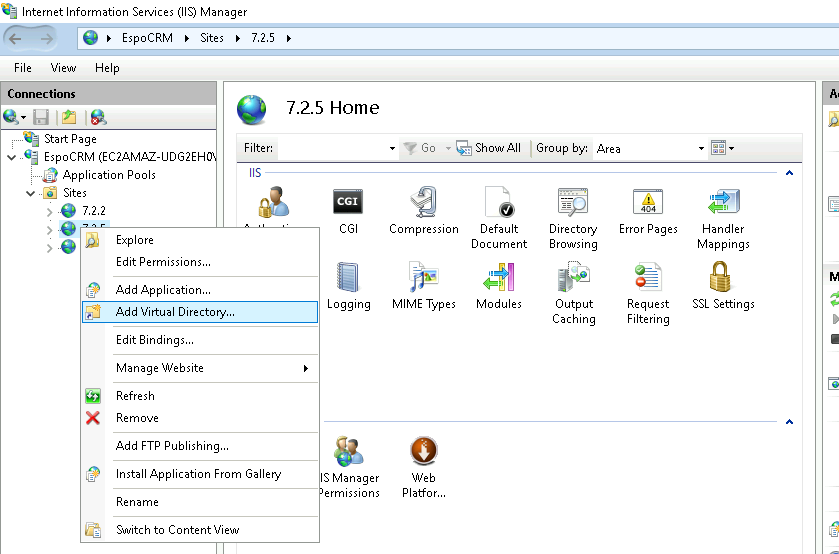
2.1. Right-click on Site in IIS manager > Add Virtual Directory.
2.3. Type the client name in the Alias field.
2.4. Specify your EspoCRM client directory path (e.g. C:\inetpub\wwwroot\EspoCRM-7.2.7\client) in the Physical Path field.
2.5. Click on OK.
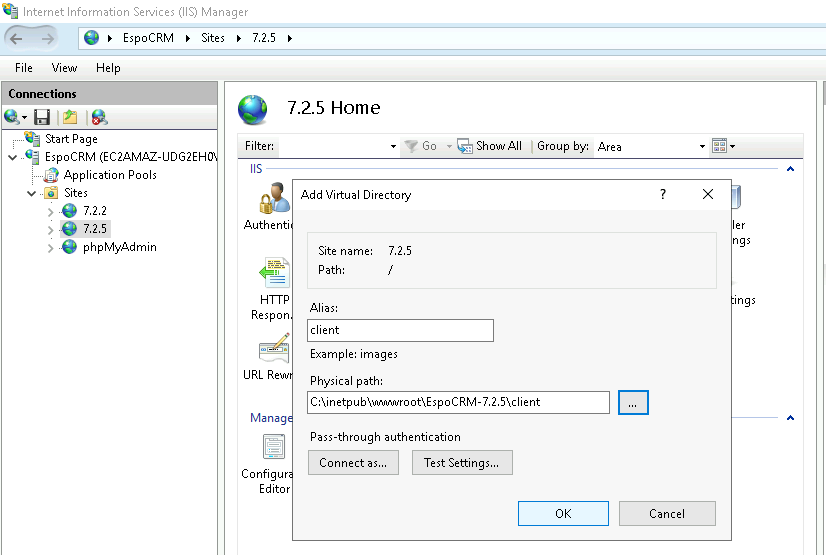
Step 3. Handler Mappings settings
Via IIS Manager
3.1. Navigate the Handler Mappings scope of your Site.
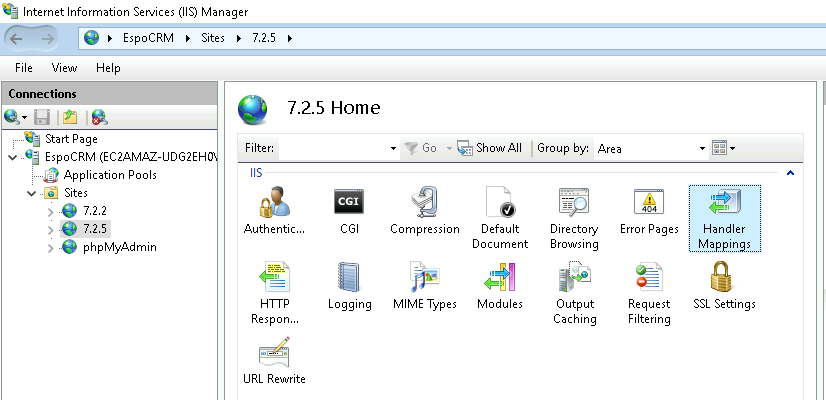
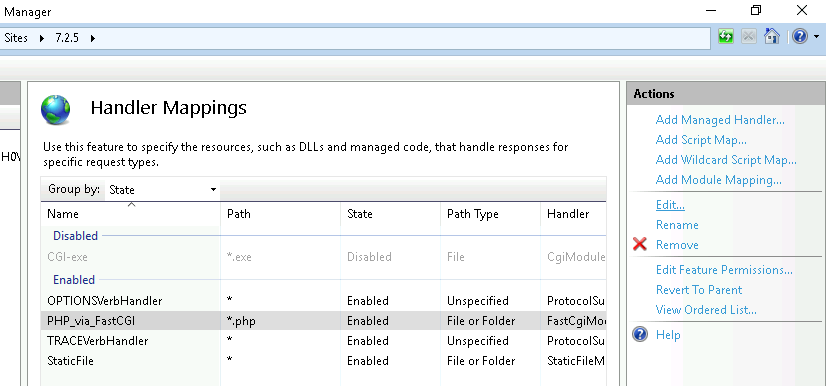
3.2. Select the PHP_via_FastCGI module > Actions > Edit.
3.3. Specify "C:\Program Files\PHP\v7.4\php-cgi.exe" path in the Executable (Optional) field (double quotes are required).
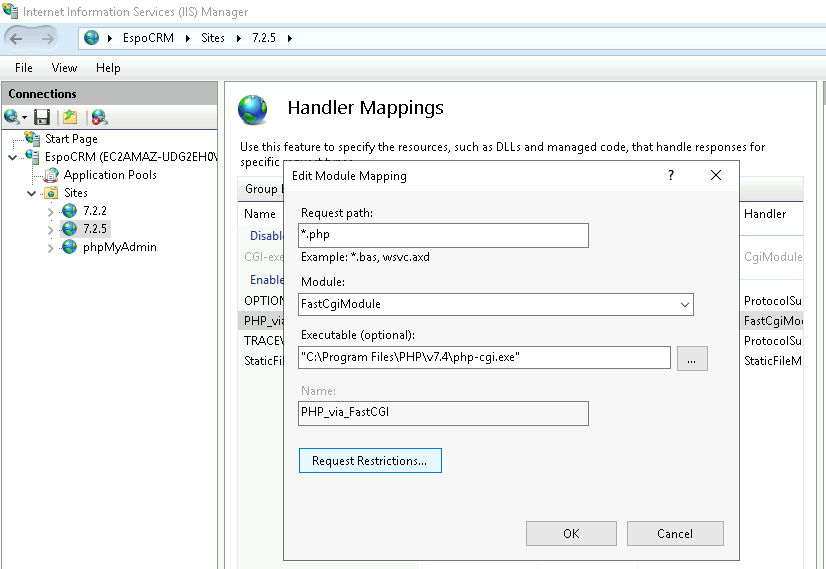
3.4. Navigate Request Restrictions > Verbs.
3.5. Specify the verbs to be handled. Select All verbs or specify One of the following verbs: GET,HEAD,POST,PUT,DELETE,PATCH, click on OK.
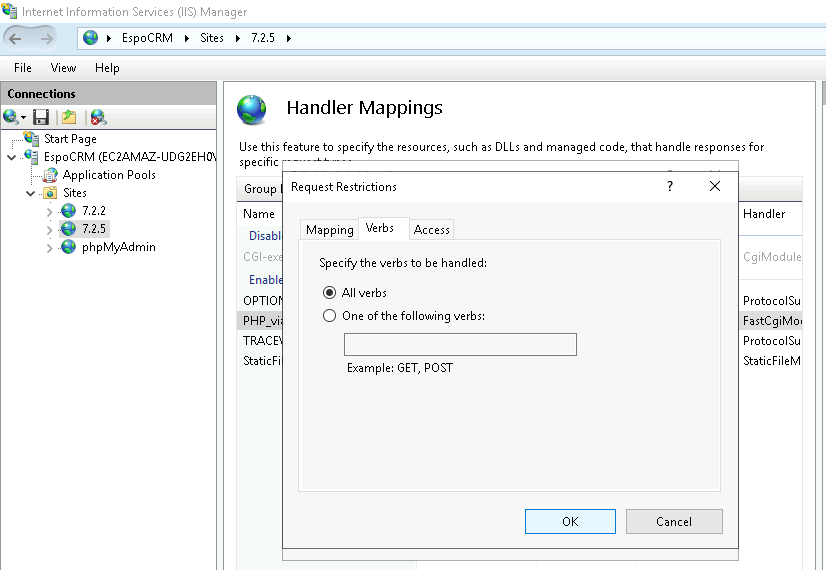
3.6. Click on OK and Yes.

Via Text Editor (Notepad as Administrator, Sublime Text, VSCode, etc.)
3.1. Open %windir%\system32\inetsrv\config\applicationhost.config file.
3.2. Locate the < handlers > tag.
3.3. Locate the "PHP_via_FastCGI" section, add all HTTP methods modifying verb="GET,HEAD,POST" value to verb="GET,HEAD,POST,PUT,DELETE,PATCH".
3.4. Save the ApplicationHost.config file.
Step 4. Permissions
4.1. Open your EspoCRM instance directory, right-click on it > Properties > Security > Edit.
4.2. For user names IIS_IUSRS, check all available boxes in the Allow column.

4.3. Click on Apply and OK.
Reboot your IIS server after all the steps are done.