VoIP Customization
In this article:
- Displaying a call recording
- Grant access to Messages
- Grant access to Calls
- Add click-to-call feature to a custom entity
- Add custom entities to Permitted Entities
- Add custom entities to Quick Create Entities
- Event information in Permitted / Quick Create Entity
- Adding a call name to a call popup
- Format phone number
- Call recording for Asterisk
- Adding a custom call recording handler
- Adding a custom ApiClient
- Adding a custom EventListener
- Adding a custom WebhookHandler
- Adding a custom CidManager
- Adding a custom Call attribute
- Additional info
Displaying a call recording
For displaying call recordings in EspoCRM, go to Administration > Layout Manager > select Calls entity and add the field "Recording" for Detail layout. See the screenshot:
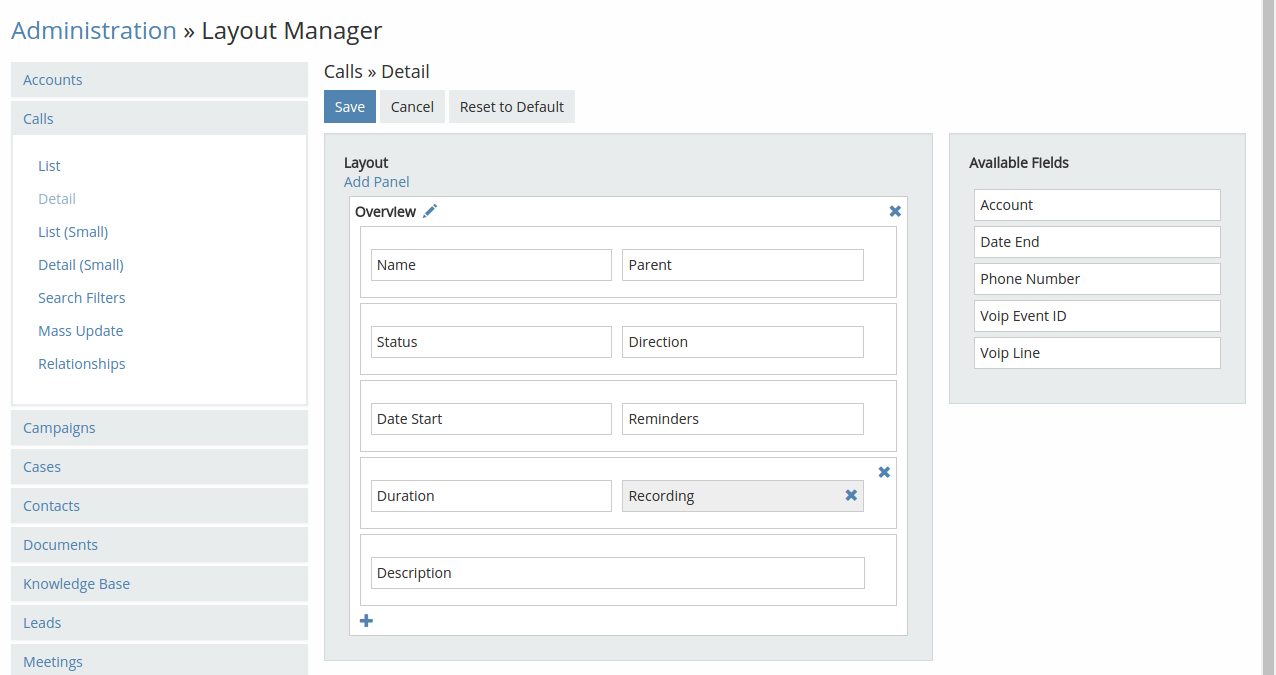
After that, clear a local cache (Menu > Clear Local Cache).
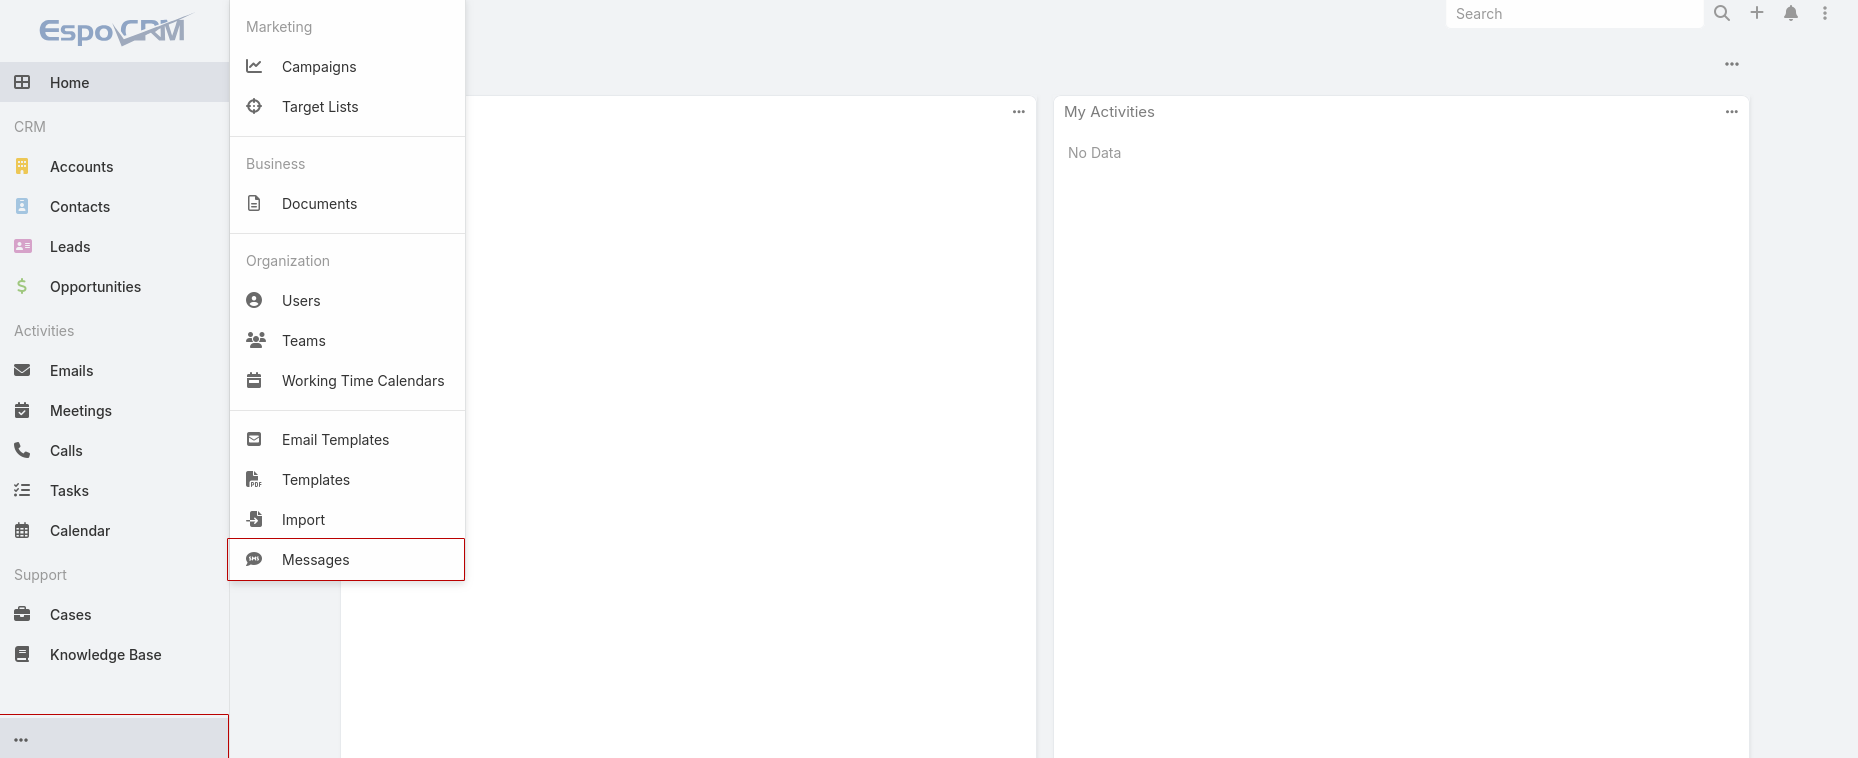
Grant access to Messages
By default regular users don’t have access to Message entity. Administrator needs to grant access to this entity:
- Login as Administrator in EspoCRM.
- Navigate to the Administration > Roles.
- Create / edit a Twilio role.
- Grant access to the Message entity.

By default the Message entity tab should be added into the tab list.
Grant access to Calls
Don't forget to give users access to the entity 'Calls', so that they could make and accept calls. Go to the needed User > Roles.
Select the role or create a new one. Turn on 'Enabled' access to the entity 'Calls' and click 'Save'.
Add click-to-call feature to a custom entity
To add a click-to-call feature to a custom entity you have to create/edit a file /custom/Espo/Custom/Resources/metadata/entityDefs/<YOUR_ENTITY>.json.
In this file should be defined a phoneNumber field (a field with "type": "phone"). Add the following line to this field:
{
    "fields": {
        "phoneNumber": {
            ......,
            "view": "voip:views/fields/phone"
        }
    }
}
Make sure that your JSON data is correct after changes.
To take effect, clear a system cache (Administration > Clear Cache) and reload a page in your browser.
Add custom entities to Permitted Entities
Important: the added entity must be of the Person type.
To add some custom entities to Permitted Entities, create/modify the file /custom/Espo/Custom/Resources/metadata/integrations/<CONNECTOR_NAME>.json with the code:
(e.g. for Asterisk connector it's the file /custom/Espo/Custom/Resources/metadata/integrations/Asterisk.json)
{
    "fields": {
        "permittedEntities": {
            "options": [
                "__APPEND__",
                "<YOUR_CUSTOM_ENTITY>"
            ]
        }
    }
}
Make sure that your JSON data is correct after changes. To take effect, clear a system cache (Administration > Clear Cache) and reload a page in your browser.
Add custom entities to Quick Create Entities
To add some custom entities to Quick Create Entities, create/modify the file /custom/Espo/Custom/Resources/metadata/integrations/<CONNECTOR_NAME>.json with the code:
(e.g. for Asterisk connector it's the file /custom/Espo/Custom/Resources/metadata/integrations/Asterisk.json)
{
    "fields": {
        "quickCreateEntities": {
            "options": [
                "__APPEND__",
                "<YOUR_CUSTOM_ENTITY>"
            ]
        }
    }
}
Make sure that your JSON data is correct after changes. To take effect, clear a system cache (Administration > Clear Cache) and reload a page in your browser.
Event information in Permitted / Quick Create Entity
There is a way to get event information while creating a Permitted / Quick Create entity.
For example, if we need to fetch a phoneNumber into the description field for a Task entity:
1. Add the field in custom/Espo/Custom/Resources/metadata/entityDefs/Task.json:
{
    "fields": {
        "voipEventData": {
            "type": "jsonObject",
            "notStorable": true
        }
    }
}
2. Make rebuild and grant the necessary permissions.
3. Add the following formula in Administration > Entity Manager > Task > Formula > Before Save Custom Script:
$voipEventData = json\encode(voipEventData);
description = json\retrieve($voipEventData, 'phoneNumber');
In addition to phoneNumber, additional data such as id, status, type, assignedUserId, etc., can be fetched from voipEventData. All data can be viewed after adding the voipEventData field to a layout.
Adding a call name to a call popup
To display a Call name field in a call popup, create/modify the file custom/Espo/Custom/Resources/metadata/app/popupNotifications.json with the code:
{
    "voipNotification": {
        "additionalFields": {
            "callName" : {
                "display": true,
                "fullWidth": true,
                "entity": "Call",
                "field": "name",
                "order": 9
            }
       }
    }
}
- default order is 10.
Make sure that your JSON data is correct after changes. To take effect, clear a system cache (Administration > Clear Cache) and reload a page in your browser.
Format phone number
When a telephony server returns a phone number in a wrong format e.g. 004959123456789@SIP-PROVIDER-154303332258115083be1. To get this number in a normal format, create/edit a file custom/Espo/Custom/Resources/metadata/app/voip.json and add the code:
{
    "phoneNumberReplacement": {
        "Asterisk": {
            "^goip-.*?\\/": "",
            "@SIP-PROVIDER.*": ""
        }
    }
}
where
- "Asterisk" - a connector ID;
- "@SIP-PROVIDER.*" - regular expression to find unnecessary characters;
- "" - a string for replacing.
Note: JSON format has its own quoting, e.g. a symbol "/" should be quoted like "\/".
Then go to Administrator panel > Clear cache.
Call recording for Asterisk
The call recording should be configured on the Asterisk side, the URL of that recording will be saved in EspoCRM.
The setup process:
1. Configure a call recording on the Asterisk side.
2. Login to EspoCRM under the administrator and go to the Asterisk connector (Administration > VoIP Settings > Asterisk AMI).
3. Enable the "Listen recorded calls" option and configure the "URL to recorded calls" field.
Possible parameters:
- "{VOIP_UNIQUEID}" - uniqueid of a call;
- "{Y}" - year of a call;
- "{m}" - month of a call;
- "{d}" - day of a call.
Example:
If we have a link in a format: "http://11.11.11.11/2019/11/25/1568202771.6.mp3", then the "URL to recorded calls" should be the following:
http://11.11.11.11/{Y}/{m}/{d}/{VOIP_UNIQUEID}.mp3
4. Display a call recording field in a layout of Call entity.
For displaying a call recording field in EspoCRM, go to Administration > Layout Manager > select Calls entity and add the field "Recording" for Detail layout. See the screenshot:
After that, clear a local cache (Administration > Clear Cache).
Custom call recording handler
If the standard functionality doesn't meet your recording processing needs, you can implement a custom call recording handler. For example, here's how you can customize it for the Asterisk connector:
1. Create a file located at custom/Espo/Custom/Modules/Voip/Providers/Asterisk/Recording.php with the code:
<?php

namespace Espo\Custom\Modules\Voip\Providers\Asterisk;

use Espo\Modules\Voip\Entities\VoipEvent;

class Recording extends \Espo\Modules\Voip\Providers\Asterisk\Recording
{
    public function process(VoipEvent $voipEvent, string $triggeredBy): void
    {
        // YOUR CUSTOM CODE
    }
}
2. Create / edit a file custom/Espo/Custom/Resources/metadata/app/voip.json:
{
    "recordingProcessorClassNameMap": {
        "Asterisk": "Espo\\Custom\\Modules\\Voip\\Providers\\Asterisk\\Recording"
    }
}
3. After saving, clear a local cache (Administration > Clear Cache).
Custom ApiClient
For adding a custom ApiClient, create a file located at custom/Espo/Custom/Modules/Voip/Providers/YOUR_PROVIDER/ApiClient.php with the code:
<?php

namespace Espo\Custom\Modules\Voip\Providers\YOUR_PROVIDER;

class ApiClient extends \Espo\Modules\Voip\Providers\YOUR_PROVIDER\ApiClient
{
    // YOUR CUSTOM CODE
}
After saving, clear a local cache (Administration > Clear Cache).
Custom EventListener
For adding a custom EventListener, create a file located at custom/Espo/Custom/Modules/Voip/Providers/YOUR_PROVIDER/EventListener.php with the code:
<?php

namespace Espo\Custom\Modules\Voip\Providers\YOUR_PROVIDER;

class EventListener extends \Espo\Modules\Voip\Providers\YOUR_PROVIDER\EventListener
{
    // YOUR CUSTOM CODE
}
After saving, clear a local cache (Administration > Clear Cache).
Custom WebhookHandler
For adding a custom WebhookHandler, create a file located at custom/Espo/Custom/Modules/Voip/Providers/YOUR_PROVIDER/WebhookHandler.php with the code:
<?php

namespace Espo\Custom\Modules\Voip\Providers\YOUR_PROVIDER;

class WebhookHandler extends \Espo\Modules\Voip\Providers\YOUR_PROVIDER\WebhookHandler
{
    // YOUR CUSTOM CODE
}
After saving, clear a local cache (Administration > Clear Cache).
Custom CidManager
For adding a custom CidManager, create a file located at custom/Espo/Custom/Modules/Voip/Providers/YOUR_PROVIDER/CidManager.php with the code:
<?php

namespace Espo\Custom\Modules\Voip\Providers\YOUR_PROVIDER;

class CidManager extends \Espo\Modules\Voip\Providers\YOUR_PROVIDER\CidManager
{
    // YOUR CUSTOM CODE
}
After saving, clear a local cache (Administration > Clear Cache).
Custom Call Attribute
Note: This method is specifically designed to work with 3CX integration only.
To add a custom attribute for the Call entity, create or edit a file located at custom/Espo/Custom/Resources/metadata/app/voip.json with the code:
{
    "callAttributes": {
        "3cx": [
            "__APPEND__",
            "cAttribute"
        ]
    }
}
After saving, clear a local cache (Administration > Clear Cache).
Additional info
Dialout Channel – channel format for outgoing calls.
It can be “SIP/###” or “PJSIP/###”, where ### is a user’s extension (internal number). The extension “###” will be substituted automatically depending on the user.